PyQt through examples
To create a graphical interface, we’ll use PyQt5. Although originally designed for C++, it has a python wrapper, so we can use it with python. To install it just do:
pip3 install PyQt5
To understand how PyQt works, we’ll analyze three progressive examples. Download them from examples_pyqt.zip. Make sure that you unzip the file in a clean directory. Later on we will move some of these files in our image_viewer project, but not right now
unzip examples_pyqt.zip
After unzipping, you’ll have a series of three python file examples and a directory called icons containing some sample icons. To test the first example (and similarly for the two other examples), just do:
python3 interface_ex1.py
Analyze the code following the explanations, and check how the different features of the interface are programmed. Try to add small modifications and check the result.
interface_ex1
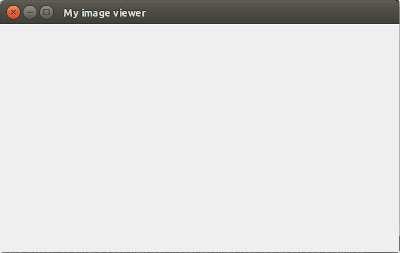
This very basic example creates a simple graphical window such as the one shown below. It illustrates how to launch a QApplication and to show a MainWindow widget (see QMainWindow). In this case, the interface does not allow to do anything, just minimize, maximize and close the window, using the buttons of the top bar where the title of the window is shown. These actions occur without any further feedback. Observe the method initUI() that sets the title and size of the window. Try to change these parameters.
interface_ex2
This second example provides more complexity to the previous one. First, it adds an icon to the application. This icon is shown in the side bar of the screen when the application runs (in Ubuntu, at least). Next, it adds a new method to the class QApplication: the method closeEvent(). This method is invoked when the user clicks on the closing button of the window (small cross). It shows a dialog widget called QMessageBox that opens a new window on top of the main one with a question and two buttons. If the user confirms, the window is closed. Otherwise, the dialog closes but not the window.
Try to change the title and the message of this dialog box.

interface_ex3
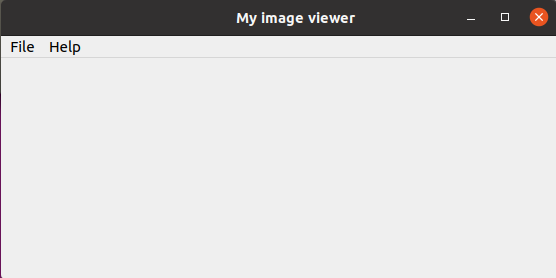
This third example adds a step further to the previous two. Specifically, it adds a menu bar to the interface with submenus: Help and File. The position of this bar may be different depending on the operating system version. In Ubuntu 18, it appears as follows:
The menus are new attributes of the class MainWindow. Observe how the menu bar is created, and how the two submenus are added to it. For instance:
self.menubar = self.menuBar()
self.menuHelp = self.menubar.addMenu('Help')
In the first sentence, the attribute menuBar is created as an instance of the class QMenuBar (see QMenuBar). In the second sentence, the attribute menuHelp is created by invoking the method addMenu() of the class QMenuBar that returns a new menu with the given name and adds it to the menu bar.
The File menu contains two options: Read and Exit. Observe how we add an option to a menu: we define an a QAction and connect it to a method of the QMainWindow class. Then, we add the new QAction to the menu. For instance:
readImageAction = QAction(QIcon('../resources/icons/read.png'), 'Read image', self)
readImageAction.triggered.connect(self.read_action)
self.menuFile.addAction(readImageAction)
When the user presses the corresponding menu option (in this example, read), the method (here read_action()) will be invoked. This method and all the ones required to give functionality to the interface must be implemented. For instance, see the implementation of read_action():
def read_action(self):

       options = QFileDialog.Options()
       filename, ok = QFileDialog.getOpenFileName(self,"Read image file", "","", options=options)
       if ok:
           msgBox = QMessageBox(self)
           msgBox.setText('You asked to read ' + filename)
           msgBox.exec_()
       return
This method first opens a dialog that prompts for a file (QFileDialog). If a name is selected, it shows another dialog (QMessageBox) that shows the name of the file. This is only for the purpose of illustrating the behaviour of the file selector. Instead of showing a message, the file should be read. We’ll see that in the section The program image_viewer.

Try to add a new option to any of the two menus that, when clicked will show a dialog with your name. For instance:

Analyze the Exit option. It is connected to the method closeEvent() that we already know from the previous example. There are now two ways of closing: pressing on the cross or selecting this option of the menu. Both interactions yield to invoking closeEvent().
Finally, investigate the Help menu. The two options are associated to methods with a similar behavior: they open a QMessageBox.
Explore the documentation of the classes to modify the appearance of the interface. For instance, try to change the style of the interface using the method setStyleSheet(). Have you detected how to add shortcuts to the interface? And how to add icons for the options of the menus?
Continue exploring PyQt5 with the larger example: The program image_viewer.